Allowing FaxPress Plus to Relay Off Exchange Server 2007
These instructions enable fax-to-email capabilities for your FaxPress Plus server and Exchange Server 2007. For email-to-fax capabilities, see Installing the Exchange Server 2007 Connector.
For fax-to-email capabilities, you must setup your FaxPress Plus server to relay through an Exchange Server 2007.
First, start with a new custom receive connector. You can think of receive connectors as protocol listeners. The closest equivalent to Exchange 2003 is an SMTP Virtual Server. You must create a new one because you will want to scope the remote IP Address(es) that you will allow.
To create a custom connector:
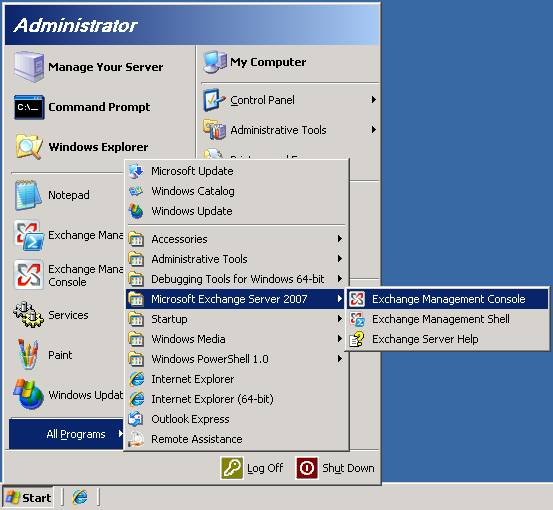
| 1. | From the Exchange Server 2007 Mail Server, go to Start>Microsoft Exchange Server 2007>Exchange Management Console. |
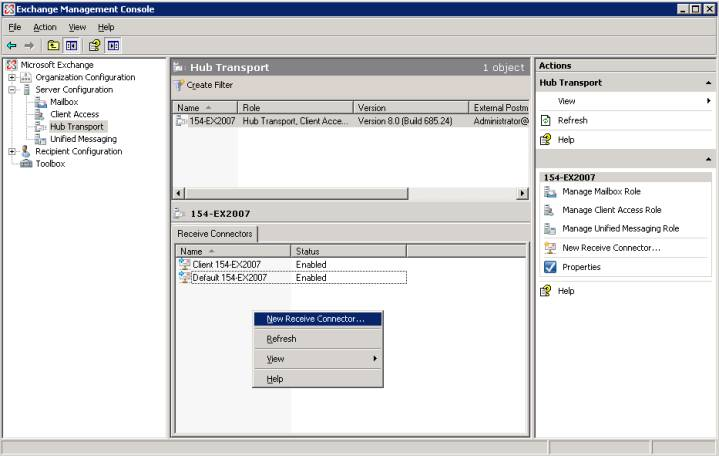
| 2. | Under Server Configuration, select Hub Transport. Right-click in the Receive Connectors section, and select New Receive Connector... |
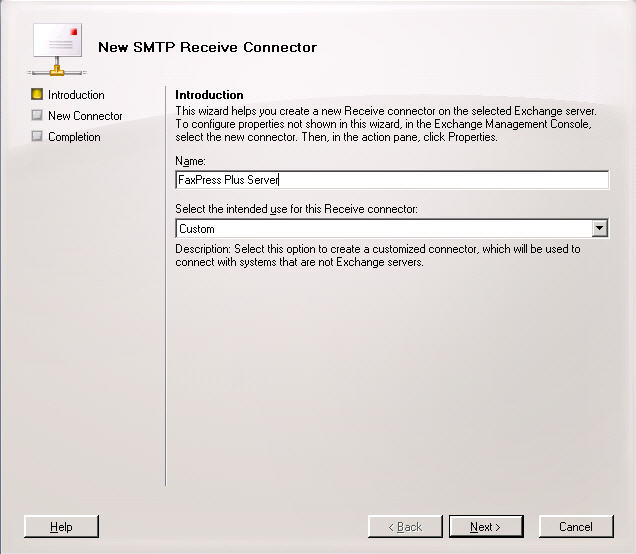
| 3. | The Introduction step of New SMTP Receive Connector wizard appears. Enter FaxPress Plus Server in the Name field. Leave the Select the intended use for this Receive connector dropdown as-is, then click Next>. |
| 4. | The Local Network settings screen appears. There is nothing to configure on the Local machine. Press Next> to continue. |
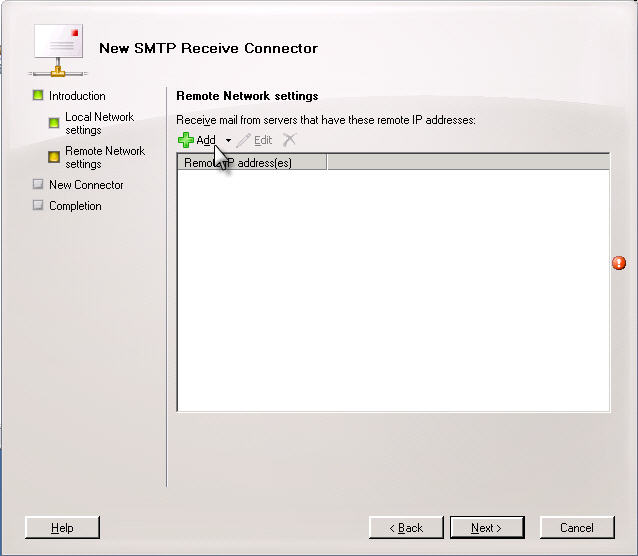
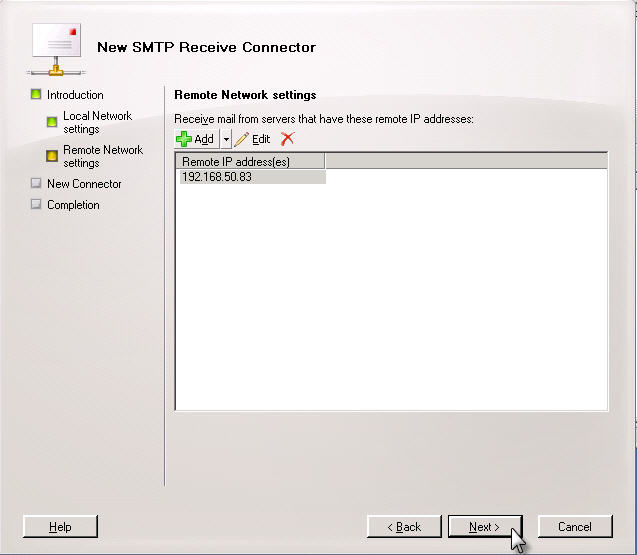
| 5. | The Remote Network settings screen appears. Specify the IP address(es) of FaxPress Plus server(s) that will be allowed to submit mail. To add a single IP address, press Add (or in the dropdown, select IP Address...). |
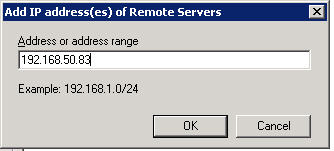
| 6. | The Add IP address(es) of Remote Servers dialog appears. Enter the IP address of the remote FaxPress Plus server and press OK. |
| 7. | Once the correct IP address is displayed, press Next> to continue. |
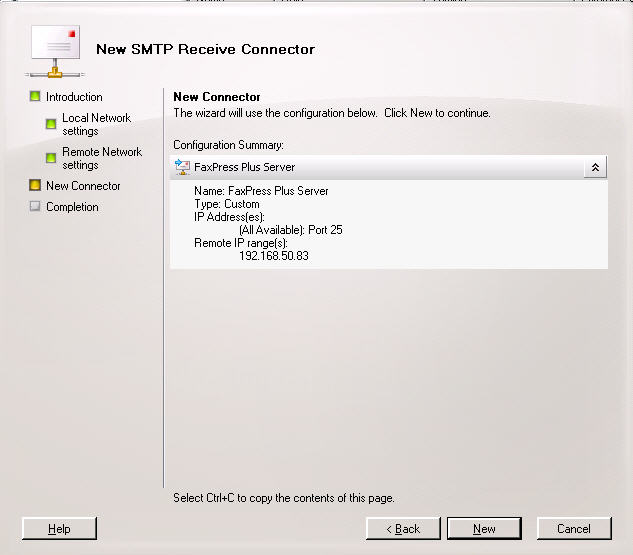
| 8. | The New Connector Configuration Summary window is displayed, detailing all the new configuration settings that are about to take place. If you need to make any corrections, press <Back to get to the appropriate screen, then press Next> to resume. Otherwise, if everything is correct press New to initiate the new settings. The Exchange Server 2007 Mail Server will attempt to initiate contact with the FaxPress Plus server. Once a connection has been established, press Finish to exit the New SMTP Receive Connector wizard. If there are any errors (as shown below), follow the instructions shown to correct them. You can press <Back to go to the appropriate step, make the necessary changes, then continue by pressing Next>. You can press Finish to accept the incorrect settings, but the FaxPress Plus Relay will not work until the configuration settings have been corrected. |
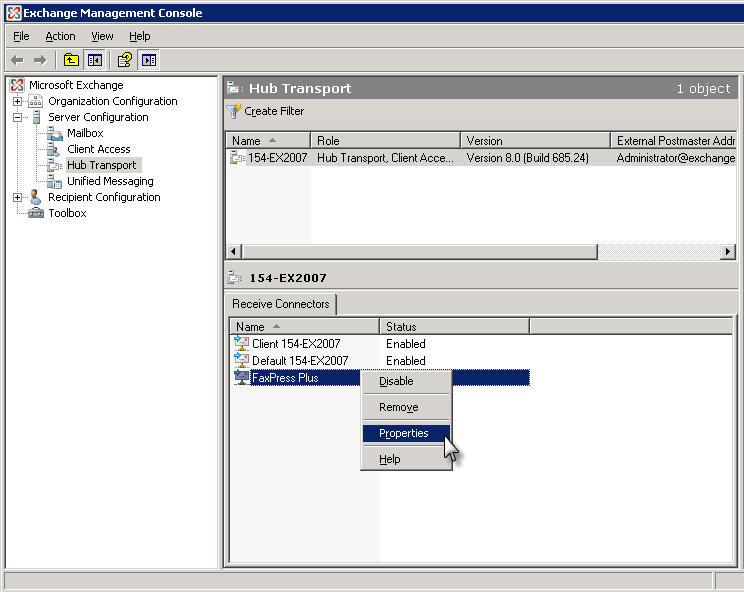
| 9. | Once the FaxPress Plus Connector is created, right-click the new connector in the Receive Connectors section of the Exchange Management Console and select Properties. |
If you do not perform the next two steps in order, the GUI blocks you from continuing. Press Cancel, then start over from step 8.
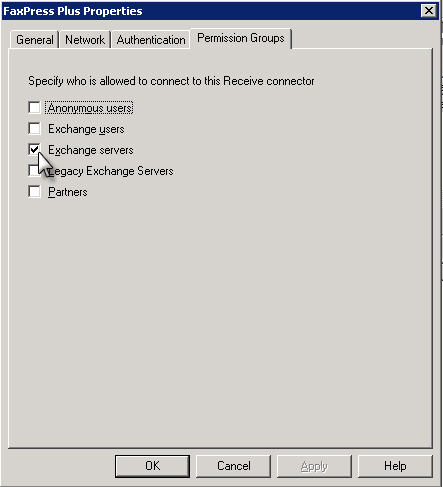
| 10. | The Properties dialog of the new connector is displayed. Select the Permission Groups tab, then select Exchange servers. Press Apply. |
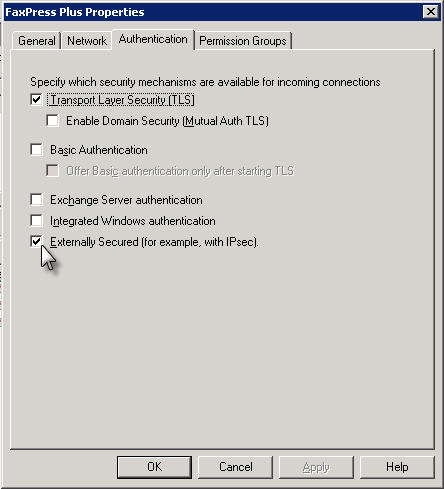
| 11. | Select the Authentication tab. Ensure that the Externally Secured (for example, with IPsec) checkbox is selected. This means that the previously designated IP address(es) will be trusted by your organization. Press Apply, then OK. |
| 12. | The fax-to-email relay configuration is complete. |
|
FaxPress Premier WebHelp
Last Updated: 11/1/2007
E-mail this page |
Castelle 855 Jarvis Drive, Suite 100 Morgan Hill, CA 95037 Toll-free 800.289.7555 Tel 408.852.8000 Fax 408.852.8100 |